 |  |
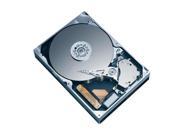
- 160GB 2.5" ATA-6 hard drive: SAMSUNG Spinpoint M Series HM160HC 160GB 5400 RPM 8MB Cache ATA-6 Notebook Hard Drive. ~85 USD + tax (Feb 2008)
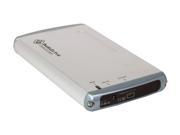
- External enclosure: BYTECC HD-201U2 (SILVER) Aluminum 2.5" USB2.0 mini External Enclosure. Comes with a USB cable that has an extra USB connector in case your computer does not provide enough power. It also comes with a black fake plastic folder that I never use. ~19 USD + tax (Feb 2008)
Over the last year (Jun & Oct 2007, Jan 2008, Feb 2008), I've bought five pairs of the above products, and never had any problems. You can probably find an enclosure that is a few bucks cheaper, but I find the above reliable so I stick with it. I get my things from NewEgg.com, because they are fast, convenient, and get good reviews. I'm very happy with them and had no problems. Note, you need to have a US credit card or US PayPal account to shop there.
Update (Sept 2008): I've just got myself a 320HB drive that works great on my Thinkpad X60 using only one USB port (on some notebooks you might need to connect the drive to two USB ports to get enough power):
- 320GB 2.5" SATA hard drive: SAMSUNG M6 Series HM320JI 320GB 5400 RPM SATA 1.5Gb/s Notebook Hard Drive OEM. ~99 USD + tax (Sept 2008)
- External enclosure: BYTECC HD1-SU-BLACK 2.5" USB2.0 External Enclosure. Comes with a USB cable that has an extra USB connector in case your computer does not provide enough power. It also comes with a black fake plastic folder that I never use. ~14 USD + tax (Sept 2008)
Anyone can assemble these. It is easy. You get the hard drive in a sealed package protecting for static electricity. Before you open that package, just make sure you don't run around in socks on a fury carpet, because that could build up static electricity. Just in case, I always put my hands on my kitchen sink to discharge. The external enclosure comes in two pieces plus USB cable, the main case and the rear panel where you connect the drive and the USB cable. Gently connect the drive to the enclosure panel and make sure it is pressed all the way in. Then insert the drive in the enclosure and use the two screws to fix the rear panel to the main enclosure. If you don't have the tiny Phillips screw driver needed, just use a sharp kitchen knife or similar (I do that). Next, connect the USB cable and hook it up to your computer. The LED on the enclosure should lit up immediately.
Before you can start use the drive you first have to partition the drive and then format it. This is only needed to be done once for the drive. When done once, the drive can be used anywhere. I will explain in detail how to do this on Windows XP, but it should be similar on all systems (and probably also easier).
Partition the drive:
- In Windows XP/Vista/7, go to Start -> Control Panel -> Administrative Tools -> Computer Management. Then Go to Storage -> Disk Management. (or just run 'diskmgmt.msc')
- In the Wizard, initialize the disk. This takes one second and the disk gets state "Online".
- In the panel showing available disks, click on the disk that is "Unallocated".
- In the part showing the size of the disk with the word "Unallocated", right click to select "New partition...".
- In the wizard, click next.
a) Choose Primary partition (or Extended partition).
b) Select the size of the partition (if only one partition, select maximum size).
c) Assign a drive letter, e.g. "H:".
d) Select "Do not Format this partition" and click "Next".
e) Click "Finish". - You should now see that "Unallocated" has been replaced by "Healthy".
That's all!